Today I have a little indigo dyeing going on. I needed a light blue for a piece I have been commissioned to create, a blue to echo the Salish Sea. Indigo dyeing requires a lot of time and preparation. Yesterday I worked on creating the stock solution. Today was creating the working vat and then […]
dyeing
Blue
Blue. Yes everyone we are back to our regular programming. Back to wool, silk and cotton. Back to art, fine craft, and handmade.
The last two weeks have been indigo intensive. It is an outside endeavour that needs to be completed before it gets too cold. This week I attacked the scrap pile, small pieces of fabric that I had been dyed colors I didn’t love, pieces of selvedge edge, and remnants that were awkward shapes and sizes. Into the vat they went and out of the vat they came in shades of blue, green and everything in between (with a little shibori thrown in for good measure!). That is except for the brown piece of silk on the left hand side.
I have yet to figure out what has happened with this piece of silk fabric. It is either dyed in cutch or arbutus and it seems to be resisting the indigo dye. It has been dyed three times more than every other piece shown here and it shows just a mere haze of indigo dyeing. I will have to test this in the future to see if it happens again or if it is one of those strange “one off” dyeing experiences.
.
.
.
.
.
Ads on this site belong to WordPress.
Taking a Break With Some Beads
 The knitting order is done. A painting has just been finished (post to come soon!). Panels have been primed with gesso. It seemed like a good time to mix things up a bit and spend some time on fibre art.
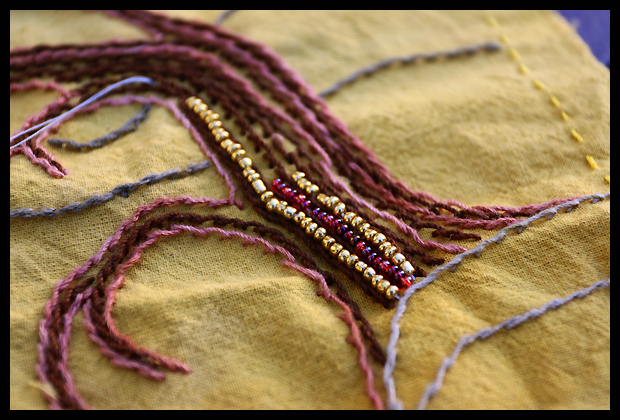
 I’ve taken a different approach to this piece compared to everything I did in 2014. First, this one is small; 10 inches by 12.5 inches or so (unmounted). Secondly, it is completely unplanned, it was a case of drawing out the image with stitch. I needed to loosen up the pieces to enjoy working on them and let them evolve and not have rules. I needed to shrink the size of the pieces as on large works the bead work was being lost in the scale. The beads worked wonderfully when viewing a piece in person (lots of “wow” factor), but on a computer screen the detail was completely lost. Unfortunately the reality now is that work needs to look better on a screen than in reality, that is how shows are chosen. So in keeping with “playing the game” I am going small with the fibre art pieces so that the beaded detail shows.
Now I am starting to flesh the image out with glass seed beads. Each bead is about 1mm in depth. Time consuming work. Last night I sat down to work on the piece, BBC documentaries playing in the background (slightly addicted to BBC docs!), and when I finally looked up at the clock it was 4:00 am. What is more, only a small portion of the area is done. Slow, slow work…and morning comes way too quickly when you work until 4:00 am or later.
 The piece is again made of naturally dyed threads and fabrics that I have hand dyed in micro batches. The base piece is cotton dyed in marigold, the blue thread in the image above is indigo. There are also, to date, appearances of logwood, cutch, and a funky lac/madder combo (seems to be a weird personal favorite on cotton….no idea why).
I am using up bits and pieces from my stash of naturally dyed materials; making what I currently have work before I end up with an unmanageable amount of naturally dyed fabrics and threads. Next in the “stash busting” will be using some of the eco-printed fabrics, perhaps incorporating stitching and beading (of course!), and maybe going with creating functional items for a change.
Fibre art by Debra Hunter
www.debra-hunter.com
.
.
Also check out the project I am building at
www.handmade-canada.com .
A project being built for for Canadian artists, artisans, writers, musicians and growers.
.
.
.
.
.
.
.
.
Ads on this site belong to WordPress.
Eco Printed Eggs
Eco printing is one of the natural dyeing techniques that I quite enjoy. You never quite know what the outcome will be, it is beyond unpredictable, and that is what makes it so fun.
 I usually eco print on silk or cotton, creating scarves or stitched pieces. Generally it is a summer activity as I prefer to work with leaves and flowers gathered in my garden.
Somewhere in the back of my mind I knew that eco printing also worked on eggs. As I had to boil eggs for a school project anyways (and I have a HUGE stash of onion skins saved), so I thought it would be fun to try.
We started with a plain old, white, uncooked egg. Wrapped it in onion skins. Secured it with elastic bands. Then hard boiled the egg just as normal.
Once the egg was cooled we carefully unwrapped the egg and ended up with a beautiful surprise.
 Quite a beautiful and safe way to dye an Easter egg.
Looking for something to read? Check out my website at www.debra-hunter.com or the new project I am just starting to grow at www.handmade-canada.com .
.
.
.
.
.
Ads on this site belong to WordPress.
What’s Happening Thursday
Seeing as I’ve been foot powered for four weeks I’ve been tackling quite a few projects. Here is what is happening today:
 Weaving in ends and blocking knit and crocheted pieces.
 Prepping cotton pieces and yarn to be scoured, mordanted and dyed.
 Reworking a crocheted prototype…different hook size and measurements. Sometimes you just “know” you can make an item more functional and better.
 Working beads into crocheted pieces.
 Breaking down yarn scraps to spin……
 ….and spinning them. The ball of yarn is growing. Quite frightening to think these scraps would normally just go to the landfill.
 I have also started another stitched piece. Smaller. Experimental. Naturally dyed (as usual). Maybe it will work, maybe it won’t, we’ll just see where it goes.
———-
Crafted by Debra Hunter
www.debra-hunter.com
—————-
Interested in the new project I’m building? Check out Handmade in Canada.
.
.
.
.
.
.
Ads on this site belong to WordPress.
“Remnants” (2015) – a new fibre art piece
Sharing a finished art piece that I have blogged on my website http://www.debra-hunter.com .
Recycling for the Wrist
Last week I shared a post called “Spinning Scraps”. It was a post describing an idea I had of taking small yarn scraps and turning them into recycled and re-useable yarn. In short it involved breaking down the yarn and re-spinning it on a Turkish drop spindle at an incredibly slow pace. It was one of those things that I just had to see if it would work.
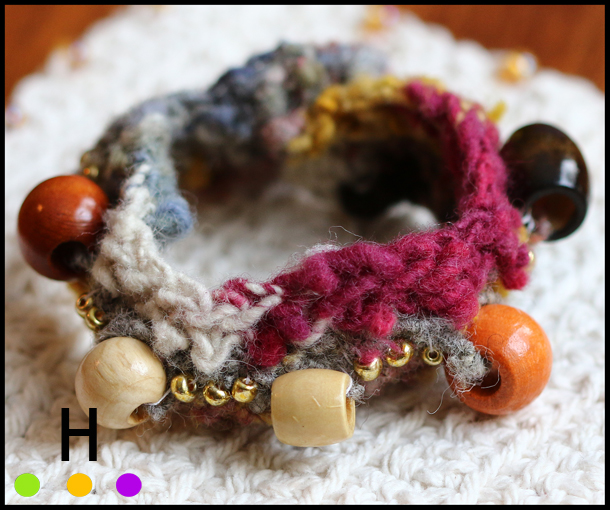
Well it did work. The yarn formed on the spindle with all sorts of pretty mixed, naturally dyed colors, and I just had to see if the yarn could actually be turned into something. I decided on a quick project (because I was very impatient to see the results) and created a crocheted bracelet.
To add to the earthiness I incorporated some wooden recycled beads bought at Nu To Yu on Pender Island (British Columbia, Canada). Every time we are on the island I hunt through the bins at the shop looking for treasures to incorporate into my projects. The button, used as a closure, is also one of my finds.
This has been a fascinating project. I am going to keep playing with the recycling of yarn, and perhaps try a larger knit or crocheted piece next. It is unpredictable, it is organic, it is eco friendly, and it is a pretty interesting way of working.
Bull Fighting
Working on this piece has been so rough it has felt like bull fighting. What a trial.
I think I may have shared a snippet of this piece before so I thought I would do a “work in progress” post as incentive to get the piece finished. Originally I started this work back in October or November, it fit a theme for a submission so I jumped in with both feet. I quickly discovered an ambitious idea, even on a small scale, takes a lot longer than a few weeks to complete so I abandoned any thought of submitting the piece.
I wanted to put together a fibre piece that had a lot of different elements. So far this piece has been naturally dyed, eco printed, had a lino-cut made of the bull skull and then printed on the fabric, it has been stitched with various hand dyed threads including some very thick lopi. Beading is still to come.
Composition was a challenge from the beginning, probably because I didn’t plot everything out and just went for it……..and then changed my mind from a small 5″x7″ piece to a 9.5″x14 inch piece part way through when I realized I wasn’t going to submit it. Thankfully the lopi helped tie the composition together.
The lino-cut didn’t reproduce exactly how I had planned either with the final look being thin and grayish. I’m not sure if the natural dye I used was maybe weaker than my last batch, or it was a case of printing a lino cut on the naturally dyed eco-printed fabric, but things didn’t go to plan. Perhaps a mix of too many variables to really be able to pinpoint the lino-cut issues. Rather than dwell on the issues stitching seemed to be the answer. I will try a print on plain fabric once this project is done and then I can see if there is a dye problem and then fix it if needed.
The other challenge has been the actually stitching, the fabric (2 layers) is almost impossible to get a needle through. I have never encountered this before. So far I have tried many different needle and thread combinations but the result has been the same, the only way I can stitch is pulling the needle through one stitch at a time with pliers. It has taken forever. Strange thing is I have used these fabrics before , they are just different cottons, and one layer at a time they are fine, but going through two layers is impossible without pliers (and you have to pull really hard too!). Really odd.
So what is left to do? I need to finish up the “grassland” stitching and stitch around the eco-printed leaves (these items aren’t included in the detailed section in the picture shown). After that a little bit of beading just to add in one more element and introduce a new texture and some new colors. The last decision will be how to frame or hang the piece (never easy to figure out).
There is still a very long way to go.
————
For those who are interested, I have a new photo project blog going, a photo essay of our neighbourhoood. It is a “mostly pictures and not much text” blog that evolved out of another blog that was started almost a year ago. I think it will be interesting to explore our neighbourhood through a lens. The blog can be found HERE if you are interested.
Of course I still write at the blogs Island Home and Debra Hunter as well. Each blog has a different focus and they are pretty fun to write.
More Knitting Finished
Winter weather definitely has it’s good points, one of them being time spent inside to finish knitting projects that have taken far too long to complete. Just before Christmas I finished this infinity scarf. I originally started it just to get an idea of how much yarn (4.6 oz.) it would take to make one so that I could dye the right amount to knit the “proper” scarf. Let’s just say knitting the sample scarf seemed to take a very long time.
It is very cozy. This is shown wrapped twice, but I quickly discovered that on a -40C day it wraps around three times to really keep the chill out.
 Gray tones are perfect for a piece that I am keeping, however I think the scarf would have been a lot more fun to knit if it had involved bright colors.
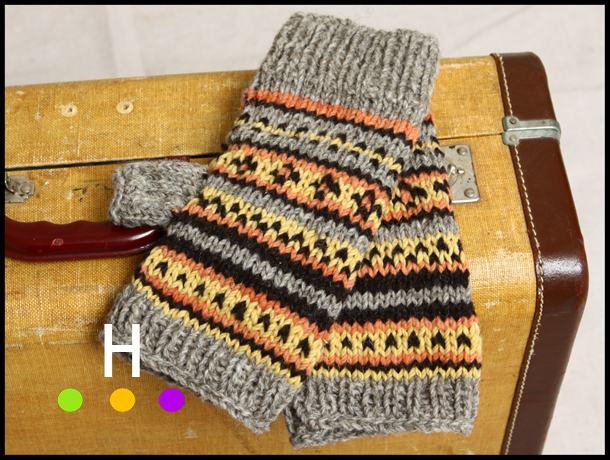
 The other night I also finished a pair of fingerless mitts that have been in progress for months. This pair consists of wool dyed in marigold and madder.
 I was so pleased to finish the mitts. Half way through I decided they were “mine” as I love the patterning. I had tucked them away in the knitting basket for a few months as they weren’t that portable to knit. I knit both mitts at the same time so that they match (plus it is boring to finish one and have to start all over!), so it was quite challenging to carry around eight balls of yarn to work on one set of mitts. I pulled the half finished mitts out last Saturday and took them to the knitting program at our library, and between the time at the library and an evening at home, the mitts were done. Rumor has it I need to make another more masculine set as my oldest son now wants a pair.
Knitting by Debra Hunter
Studio H
Red Deer, AB and Pender Island, BC (Canada)
Busy Hands

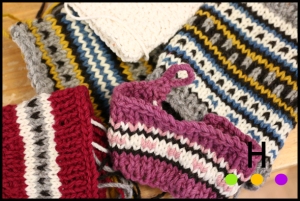
Knitting and crochet today. The knit piece is naturally dyed in chamomile , lac, madder and logwood. Bolder colors and bolder patterns. By Christmas Eve I had no knit items left so I knew it was time to get busy again. My “to do” list is long and ambitious, but I am looking forward to trying some new things. Long dark nights are perfect for staying in and knitting.


You must be logged in to post a comment.